Posted by Unknown / 10/01/2013 / 2 Comments / crafting , tutorial
Build a Scarecrow DIY Part 1
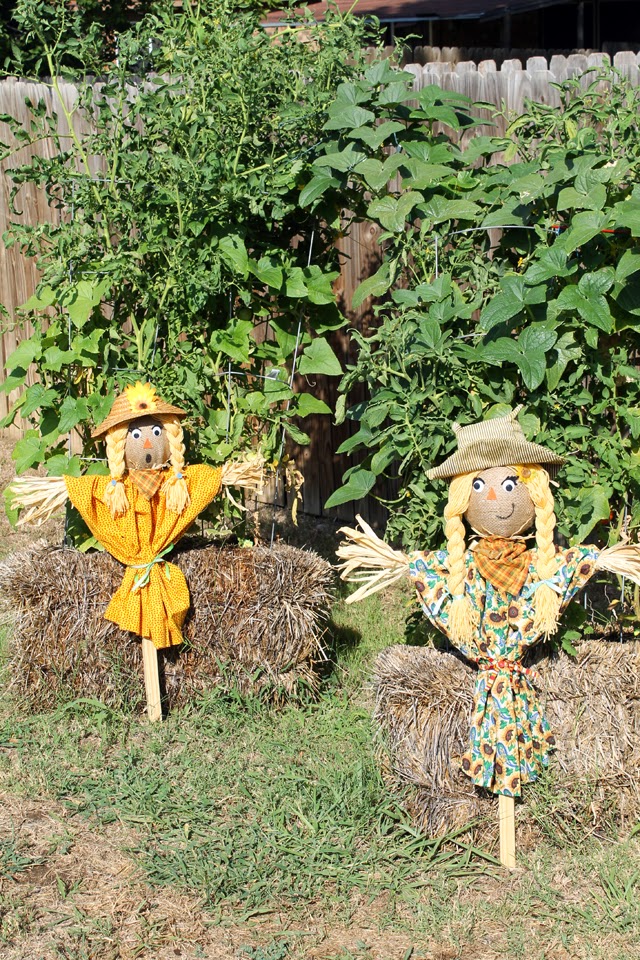
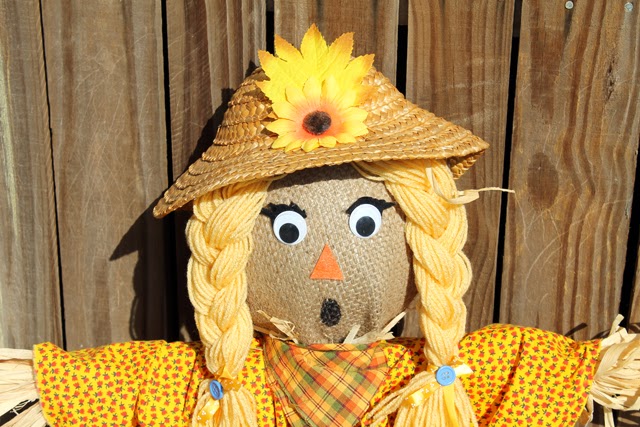
Taylor decided that we should create a couple of scarecrows for Fall decorations. I think scarecrows are super creepy, so I told her we could only build them if she could figure out how to make them not creepy. I think she actually succeeded, They're not creepy in my opinion. I thinks it's the cute braids and dresses. :)

Supplies for the frame and head:
- 2x2" board
- 1 4" screw
- Drill
- 6" Dowel Rod
- 7" foam oval
- Burlap
- Adhesive (we used both hot glue and a strong adhesive like E6000)
- Crafter's Straw
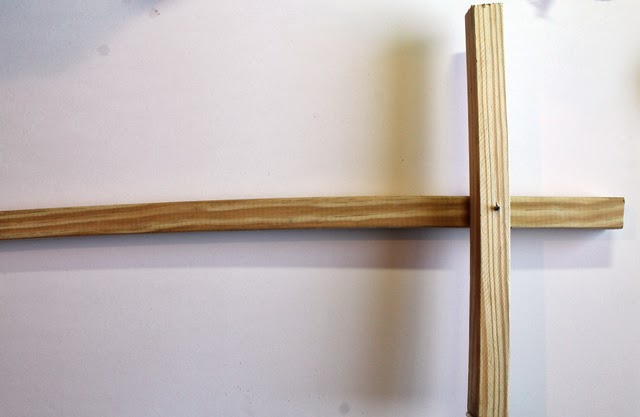
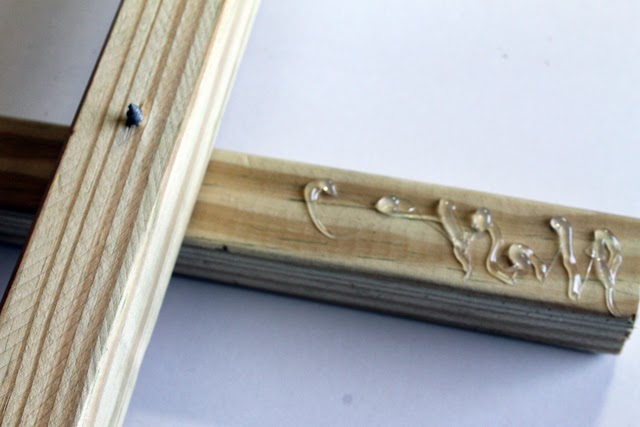
1. Cut your 2x2" board into 2 pieces one 16" and one 33". Place the shorter piece on top of the longer piece in a cross design. Screw them together using your 4" screw and a drill.
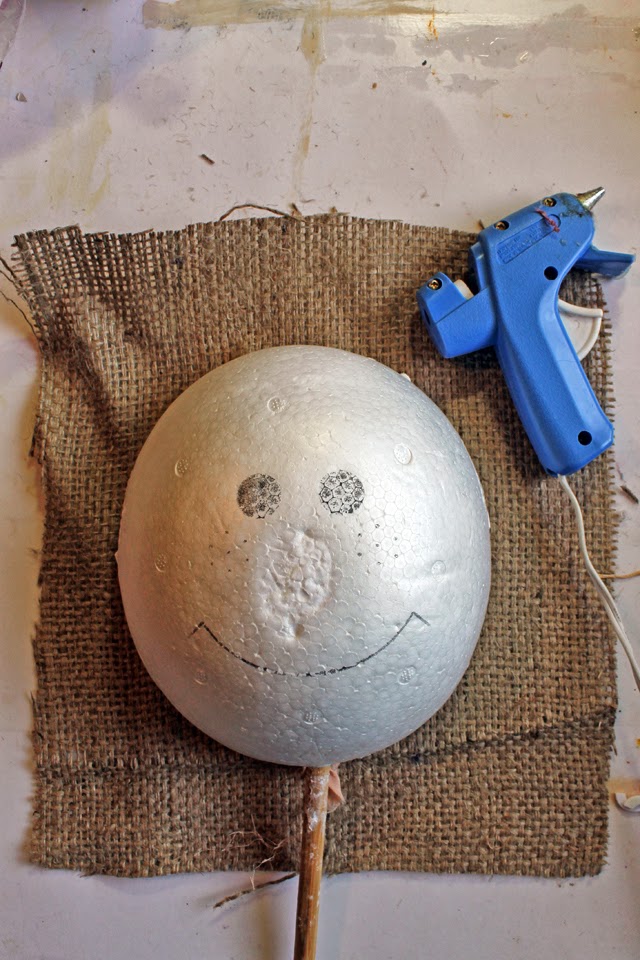
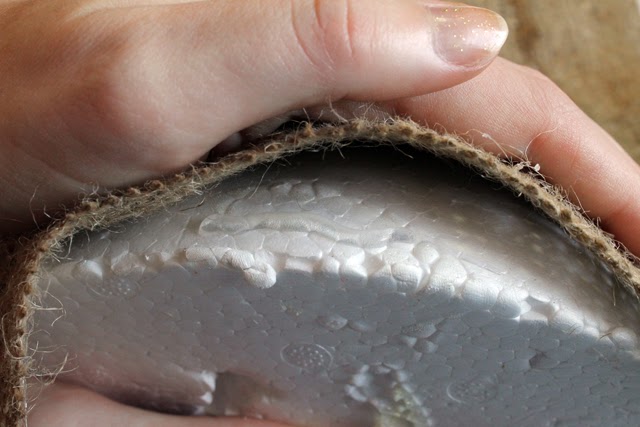
2. Insert your dowel into your foam head.Put some glue on the front of your foam head, and place a 10" piece of burlap wrapping it around the the foam face. glue it around the curved head.
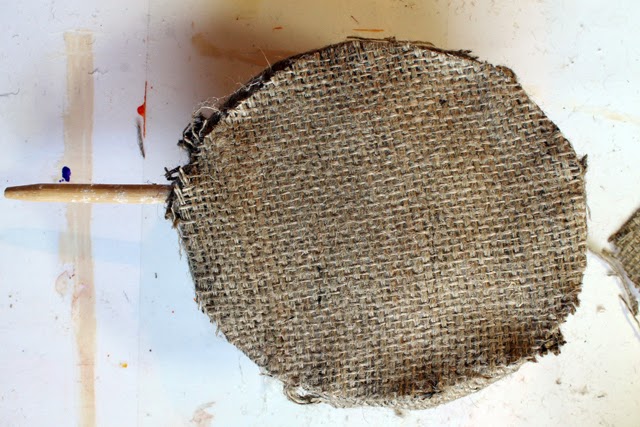
3. Flip over and trim around the edges, cutting off excess burlap. Glue a 7" oval of burlap onto the back.
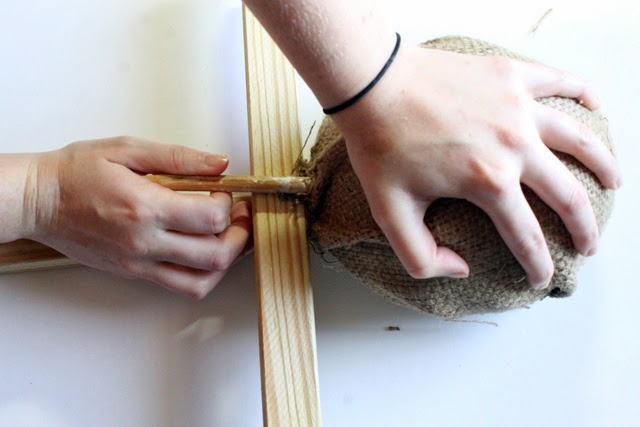
4. Place glue on the front top edge of your wooden frame and glue the dowel/head down onto the frame.
5. Glue crafter's straw onto the ends of the arms.
Check back tomorrow to see how to decorate the scarecrow! :)